Wind Turbine Truss Tower Design (continued from Term 3)
Prodedure (continued):
15. Solder the other end of your five feet of copper wire to a battery holding box. This will allow the .98 V DC engine to spin due to the rechargeable batteries and allow the propeller to recharge the batteries.
16. Paint your tower any color you would like.
17. Test your tower outside in nature and allow wind power to take over!
Output: My tower was painted black and yellow and worked well. It easily ran on battery power and/or wind power. It had a high output of voltage when it was measured.
Feedback: People said my tower was good.
What would I do differently?: I would probably make the parts where my tower becomes skinnier more sturdy. The tower split a few times so it required a few repairs.
What did I learn?: I leanred how to better form concrete andow to work with electrical circuits like running a motor with a battery pack.

Solar Vehicle Design Competition
For this project, you have to design a solar powered vehicle with the ultimate goal being to win a tournament style competition. You have to make the body and design the underneath of the car as well. This project should be fun but also the most challenging yet!
Research: The only real research avaiable to us is a book that Mr. Ramos has in his classroom. This book helps and can guide you to building a successful solar powered car. We did not spend a day in the CAD lab to reseach for this project.
Procedure:
1. Design the body of your pink foam car body on a piece of graph paper.
2. Glue three pieces of pink foam together.
3. Cut out your body design out of the pink foam you glued together and cut out slits for wheels on the side of the car.
4. Cover the pink foam with a thin coating of joint compound all around the outside of your car. This will fill in and smooth out any bumps along with allowing you to easily paint the car.
5. Use a sanding sponge to sand most of the dried joint compound off...you don't need any extra weight slowing down your solar powered car in a race!
6. Paint your car the color that you desire...I painted mine black.
7. You can put glass on your car to make a window. Attach it to the car with liquid nails.
8. With a special drill bit that cuts out pink foam in the drell press, carve out the underside of your car in order to make room for the motor, gears, axis, and wheels.
9. Attach the axis with wheels to the car while still being able to let the axis turn.
10. Attach the motor to the car and drill a hole through the car where you can connect the solar panel wires with the back of your engine.
11. Connect the engine to one of your axis (preferably the back) with gears to make the wheels turn.
12. Test your car outiside and make any adjustments.
13. Race your car in the competition!
Output: My car was painted all black and had two axis with small wooden wheels. I connected the motor to one of the axis powering one full axel, unlike most of the other cars where the engine wheel was seperate and not attached to an axel.
Feedback: My car was almost successful as it was a little too heavy to move on the pavement outside. But, a few people looked at the bottom of my car for ideas to help their car be successful in attaching the motor and axel.
What would I do differently?: I would make my car even less havy to try and make it successfully move. I would also make more car more decorative with a little more color.
What did I learn?: I learned how to create a moving car with actually converting an engine spinning into my car moving. I also saw the power of solar energy first hand!
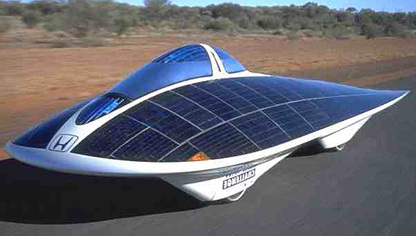
My car
Hydroponics 3000
At the end of the year, my Hydroponics 3000 contribution failed as the seed never grew into a flower, or even a little stem. The seed shriveled up and died...
